Disable recursive queries bind in CentOS

Hello,


So, you have a lot of people using your server for name name server queries ? That uses your bandwidth ? Not a problem here is the step to overcome that.


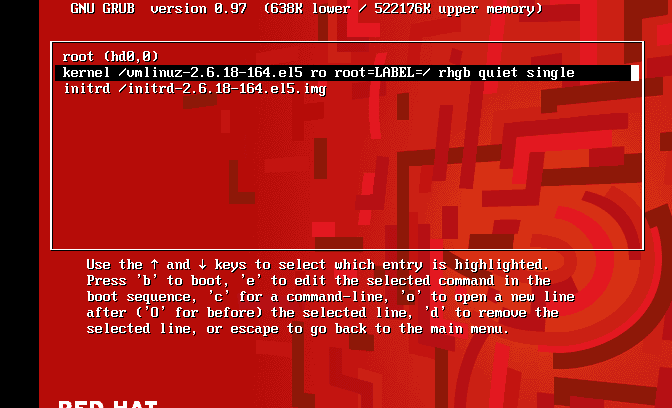
Open the file /etc/named.conf

 vi /etc/named.conf


and add below lines by replacing the old allow-recursion and allow-transfer lines

allow-transfer {“none”;};
allow-recursion {“none”;};
recursion no;

restart the named service using the below command and you are done.


 /etc/init.d/named restart


You test the same using dig command, you should find the following output.

 
[root@ns399932 ~]# dig @127.0.0.1 google.com A

; <<>> DiG 9.3.6-P1-RedHat-9.3.6-20.P1.el5_8.1 <<>> @127.0.0.1 google.com A
; (1 server found)
;; global options:  printcmd
;; Got answer:
;; ->>HEADER<


Thank you for watching

Mounting a new hard drive in linux


Hello,


In this post I will walk through adding a new hard disk drive in Linux. I added a new 20GB harddisk to the hardware. Then boot the machine. Now you will see the disk in the fdisk -l command as shown below, /dev/sdb.


1


2. Now let’s create a new partition for mounting it using fdisk command fdisk /dev/sdb.

2


3. You may use option m to know the list of options as shown below.

3


4. Now, use option n to add a new partition. Then, enter p for primary partition and e for extended partition, and enter the partition number here I am entering as 3( it can be anything between 1-4 because it is not my primary hard disk, enter the start and end size of the cylinder. Here I have used all the cylinder volume as shown in the screenshot below.

4


5. Now, enter command p to print the partition tables, and then w to write the partition table information to disk and exit as shown below.

5


7. Now, format the disk with the required filesystem type. Here I have used ext3 file system to format the disk, as shown below.

7


8. Let’s create a new folder using mkdir command, I created /disk1 folder and mounted the harddisk with mount /dev/sdb3 /disk1 command, now you can see the mounted disk which consists of 20GB size as shown below.

8


9. You edit the fstab entry to mount the disk permanently on boot. Please find the screenshot highlighted below, please use mount -a command just to verify if you have entered fstab values correctly, as shown below.

9


That’s it. You are done 🙂 Thank you for viewing helpinlinux.com


This entry was posted in linux.

Linux single user mode password reset


Hello all,


This post helps you in resetting your Linux root password, if you forgot it. Before we get started we want to make sure that we either have a console or direct access to the machine to accomplish this task.


1. Reboot your machine and wait for the below prompt.

1


2. Press any key and then you will be taken to the below menu.

screenshot 1


3. Press key ‘e’ to edit the line as described in the lines of the above screenshot.

2


4. choose the desired kernel and  press ‘e’ again to edit the line and type single at the end of the line as shown below and press enter.

3


5. Now, you will see the below prompt then press ‘b’ key to boot the machine.

4


6. The machine will boot and enter into the single user mode as given in the screenshot below. Now, you can reset the password as mentioned in the below two screenshots.

5

6


Finally, you are done. Reboot the machine and take the control over. 🙂

Plesk sub domain php downloading pages

Hello,

There seems to be a bug in plesk where the php in sub domain will not work and in main domain it works.!!. The below are the steps to overcome it.

Open the subdomain’s conf folder at /var/www/vhosts/$domain.com/subdomains/$subdomainname/conf

cd /var/www/vhosts/$domain.com/subdomains/$subdomainname/conf
vi vhost.conf

and add the below config, make sure you change the $domain.com to your domain name and $subdomainname to your subdomain name.

<Directory /var/www/vhosts/$domain.com/$subdomainname>

<IfModule mod_perl.c>
<Files ~ (\.pl$)>
SetHandler perl-script
PerlHandler ModPerl::Registry
Options ExecCGI
allow from all
PerlSendHeader On
</Files>
</IfModule>
<IfModule sapi_apache2.c>
php_admin_flag engine on
</IfModule>

<IfModule mod_php5.c>
php_admin_flag engine on
</IfModule>
<IfModule mod_python.c>
<Files ~ (\.py$)>
SetHandler python-program
PythonHandler mod_python.cgihandler
</Files>
</IfModule>
<IfModule mod_fcgid.c>
<Files ~ (\.fcgi)>
SetHandler fcgid-script
Options +FollowSymLinks +ExecCGI
</Files>
</IfModule>
Options -Includes +ExecCGI

</Directory>

Then execute the below two scripts

/usr/local/psa/admin/sbin/websrvmng -u --vhost-name=$domain.com 
/usr/local/psa/admin/sbin/httpdmng --reconfigure-all


This entry was posted in linux.

Kloxo WordPress Permissions

Hello,

The below is one of the fix to wordpress permissions that you are facing in your Kloxo panel.

[root@server]#cd /home/user/domain

[root@server]#chmod 2775 /home/user/domain -R 

[root@server]#chown user.apache /home/user/domain -R 

That’s all, now you will be able to upload plugins/themes or anything via wp-admin web interface.

Thank you for viewing helpinlinux.com

This entry was posted in cpanels.

Scalar Variable in Perl


Hello,


The following post will explain you the rules and example to use scalar variable in perl language.

Rules:
Scalar variable can be used to define single or multiple values.


Here in the following example, I have declared the variable $firstname, $lastname and $age as single value and $Designation as multiple values inside “” double quotation.

#!/usr/bin/perl -w
# Example script to declare Scalar variable

$firstname = "Siranjeevi";
$lastname = "Rajendran";
$age = 24;
$Designation = "Systems Engineer";
print "$firstname $lastname with age $age is working as $Designation\n";

#END

The output would be

Siranjeevi Rajendran with age 24 is working as Systems Engineer

Thank you for viewing helpinlinux.com

Dump All MySQL Databases Starting with Prefix


Hello,


The following shell/bash script will help you in taking backup of databases starting with prefix.


#!/bin/bash
#Script for mysql database backup

cd /var/lib/mysql
#Path to mysql folder I am using default path here
for DBs in $(ls -d */ |grep dbprefix_ | tr -d /)
do

cd /mysqlbackup

`mysqldump -u root -p'password' $DBs > $DBs.sql`


done

Escape Character in Perl example Script


Hello,


The script below explains on how to use escape characters in a perl environment

1. Perl will escape back slash “\” by default so if you referring a path to a windows system please make sure that you use two back slashes to refer one \

Eg: c:\\windows upon compilation will be referred as c:\windows

2. To preserve ” and “” from being executed we can use single “q” with braces like q{}, in other words q{} is similar to ” in perl enviroment where contents inside ” will not be executed and double “q” with braces like qq{} will execute the contents inside the braces just like “” where conents inside “” will be executed. The below script will explain you better.

#/usr/bin/perl -w
#Escape character for perl
print "c:\\windows ", 'This will print the string as c:\windows', "\n";
print q{This will preserve '' and "" without being compiled}, "\n";
print qq{This will compile contents between the braces\n};

The output of above perl script will be

c:\windows This will print the string as c:\windows
This will preserve '' and "" without being compiled
This will compile contents between the braces


Cannot register service: RPC: Unable to receive; errno = Connection refused


Hello,

Cannot register service: RPC: Unable to receive; errno = Connection refused

You are getting the above error while starting your NFS service because you have not installed or started rpcbind service.


Solution:

======

yum -y install rpcbind

and start the service

 /etc/init.d/rpcbind start