
Posts by :
test-1aug
August 1st, 2023
test4
May 2nd, 2023Test3
April 28th, 2023Test2
April 28th, 2023test
January 25th, 2023shell script to auto restart apache httpd when it goes down / dead
September 22nd, 2015Being a Linux and Cloud Engineer I happen to work on building many servers which should be reliable, and I come across few customers who just want the server to be build and least work in managing them. So, I came up to a solution to start services by themselves if the apache web server goes down using cron and if loop. The following script serves the purpose.
First let’s create a directory to put all the custom scripts to be put in there.
mkdir /scripts/

cd /scripts/
Let’s create a script and call it as apachechk.sh
touch apachechk.sh
Provide it with execution permission.
chmod +x apachechk.sh
Then let’s add the following entry to our root user’s cron
crontab -e
*/5 * * * * /scripts/apachechk.sh >/dev/null 2>&1
Now, let’s paste the following lines to the script file on our Debian/Ubuntu based system.
#!/bin/bash
#This script will check if Apache process is down in Debian/Ubuntu based system and restarts it automatically.
#Script is located at https://helpinlinux.com/shell-script-to-auto-restart-apache-httpd-when-it-goes-down-dead
#Let's declare RESTART, PGREP and HTTPD command names.
RESTART="service apache2 restart"
PGREP="/usr/bin/pgrep"
HTTPD="apache2"
# find httpd pid
$PGREP ${HTTPD}
#Check if the process retruns not value[apache2 not running].
if [ $? -ne 0 ]
then
 # restart apache
 $RESTART
fi
If you are using CentOS/Redhat based system please add the following code to your apachechk.sh file.
#!/bin/bash
#This script will check if Apache process is down in Redhat/CentOS based system and restarts it automatically.
#Script is located at https://helpinlinux.com/shell-script-to-auto-restart-apache-httpd-when-it-goes-down-dead
#Let's declare RESTART, PGREP and HTTPD command names.
RESTART="service httpd restart"
PGREP="/usr/bin/pgrep"
HTTPD="httpd"
# find httpd pid
$PGREP ${HTTPD}
#Check if the process retruns not value[httpd not running].
if [ $? -ne 0 ]
then
 # restart apache
 $RESTART
fi
Reference: http://bash.cyberciti.biz/web-server/restart-apache2-httpd-shell-script/
Fixing wordpress file permissions upload file could not be moved & wordpress asking for FTP login
August 20th, 2015Hello,
Many of the wordpress developers/ system admin beginners would have come up to this issue where you will be annoyed with permission issues as mentioned below or you will be prompted to enter FTP logins whenever you upload plugins themes or update wordpress

This post assumes that you already have a wordpress site and LAMP server using CentOS/Redhat or fedora based OS.
All you need is mod_ruid2 module working to fix these issues.
First let us install all the modules that is required for compiling apache module.
yum group install -y 'Development Tools'
Once done, we will install devel tools for compiling mod_ruid2
yum install -y libcap-devel httpd-devel
Now, let’s download and install mod_ruid2
cd /usr/local/src
wget http://sourceforge.net/projects/mod-ruid/files/mod_ruid2/mod_ruid2-0.9.8.tar.bz2
apxs -a -i -l cap -c mod_ruid2.c
Then let’s open the apache virtual host config file and add the following line below DocumentRoot entry of our website.
RMode stat
    RUidGid steptocloud steptocloud
    RGroups steptocloud
Then let’s restart apache
On CentOS7
systemctl restart httpd.service
On CentOS6 or CentOS5
service httpd restart
Youtube Link
netstat command install RHEL/CentOS 7
April 4th, 2015Hello all,
We need to install net-tools package to enable netstat command in CentOS/RHEL 7 based systems.
yum install net-tools
This will install required files for netstat command.
Thank you for viewing https://helpinlinux.com
restorecon: command not found CentOS 6 & 7
April 4th, 2015Hello team,
I have come across strange issue when trying to save iptables rules. I received the following error.
service iptables save
O/P
iptables: Saving firewall rules to /etc/sysconfig/iptables: /etc/init.d/iptables: line 274: restorecon: command not found.
You need to install policycoreutils package to fix the same.
yum install policycoreutils
and now you will be able to save iptables rules.
Reference: https://raymii.org/s/snippets/CentOS_Save_iptables_restorecon_error.html
Creating IAM user with access control
February 11th, 2015IAM user is most important when it you want to grant access to different users say developer, administrator and partner. There are various level of access that you can choose to grant access to the users depending upon their requirements. The following guide helps us to create IAM user account with EC2 administration privileges, the user that we are creating will have full access to EC2 resources. Let’s get started.
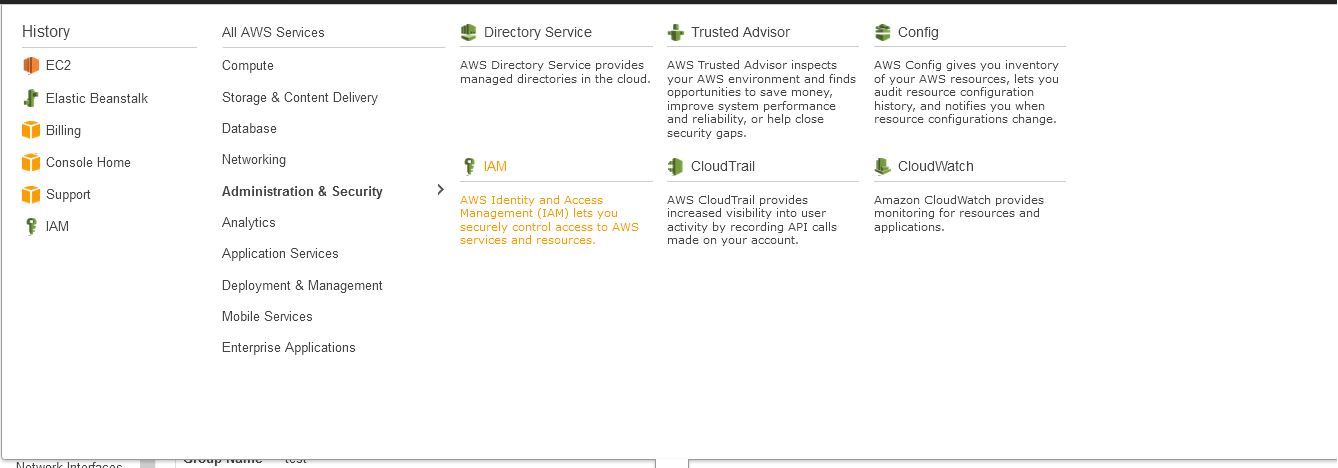
1. Login to AWS console and navigate through Services –> All AWS Services –> Administration & Security –> (Identity Access Management) IAM as shown below.
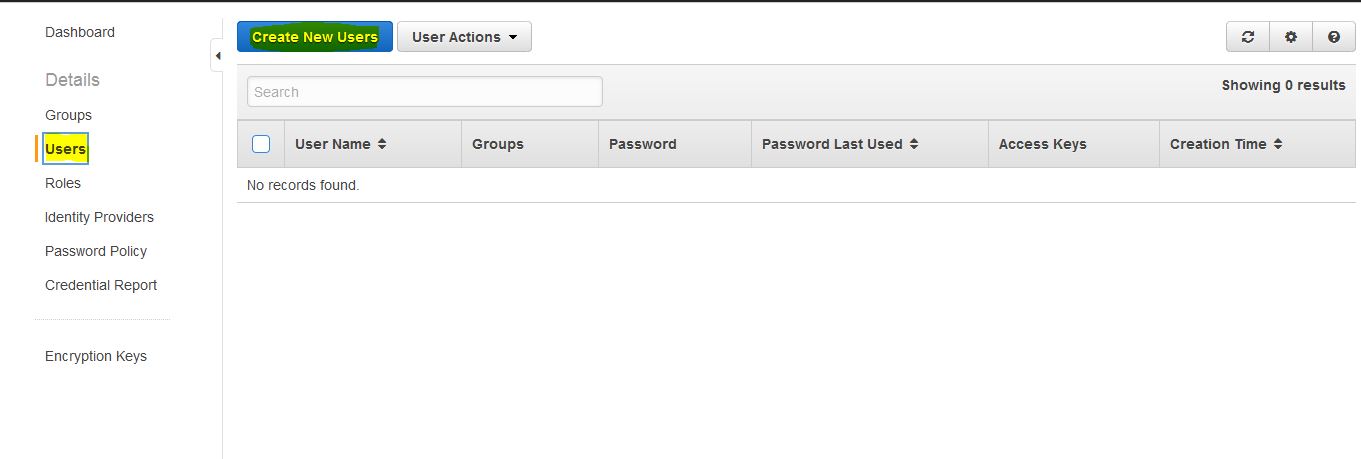
2. Goto Users and create a new user,
3. Enter the username and download the credentials,( you can create upto 5 users IAM users).
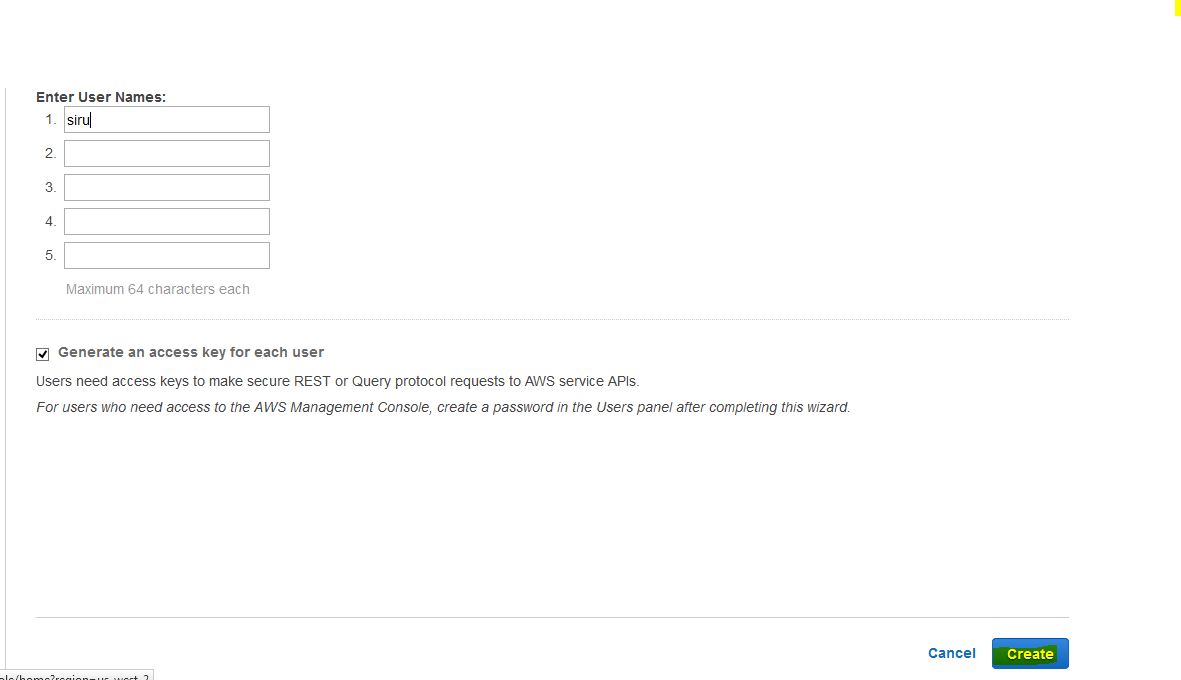
4. You will be prompted to download the credentials, this is security keys useful to manage users via S3 uploads etc.

5. Let’s create password for users as shown in the below steps.
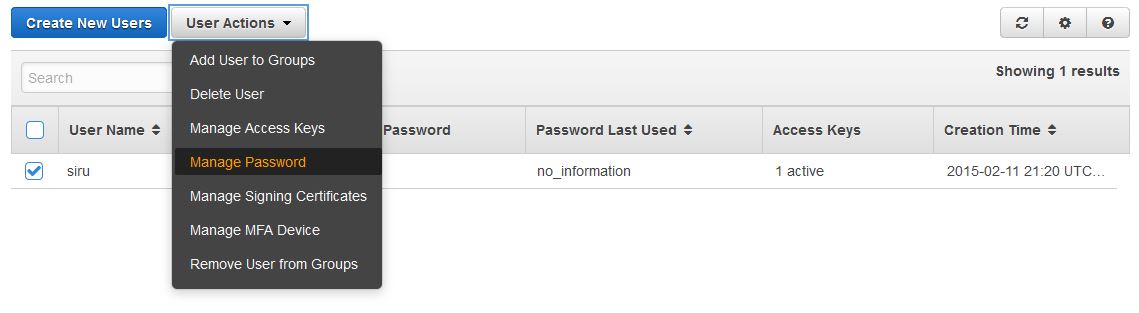
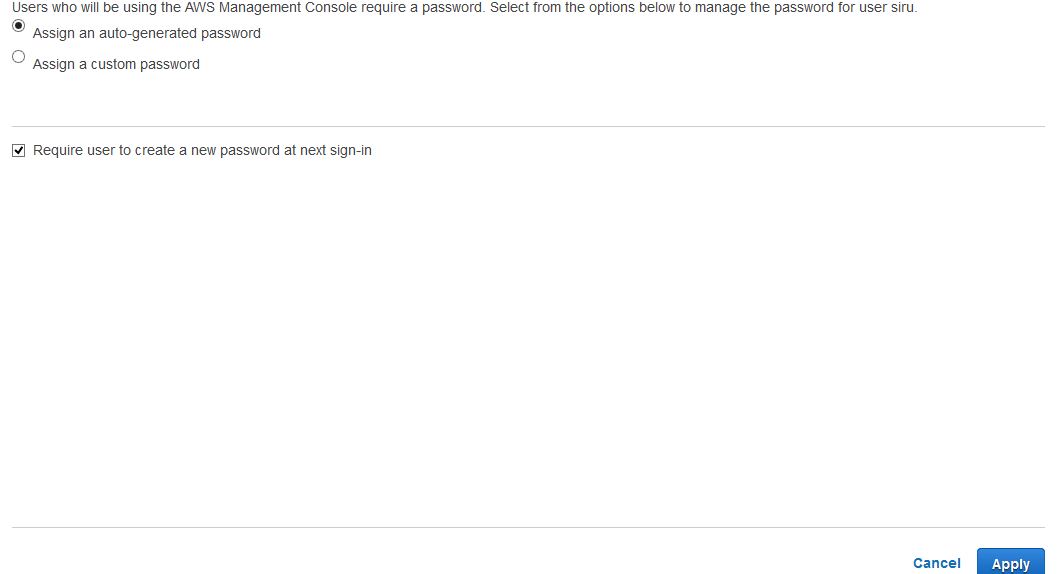
a. Allow user to reset their own password “check Allow users to change their own password” and Apply policy.
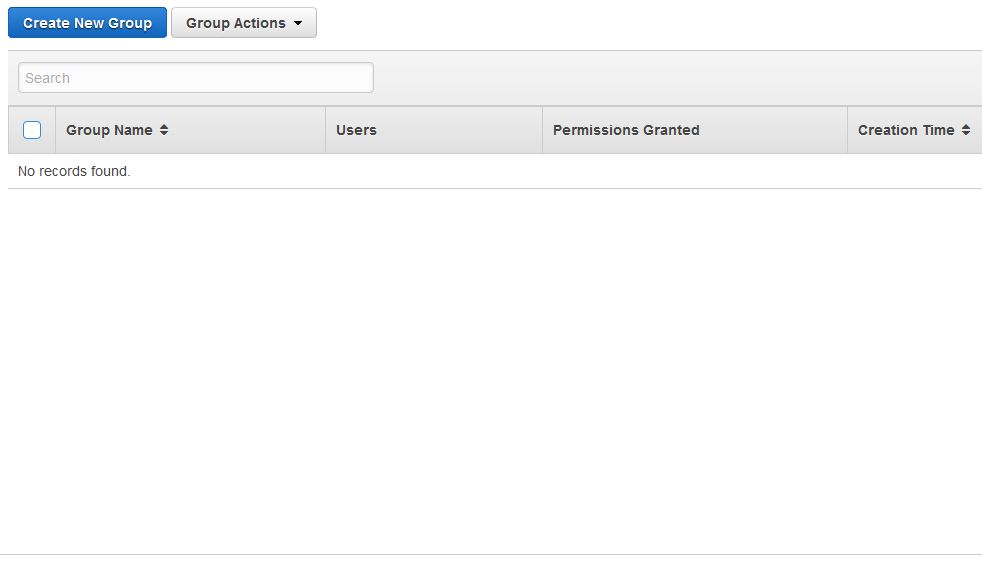
6. You will now be prompted to download the credentials file. The downloaded file will contain the login information of the user that we created. Now, let’s go to Groups and create a Group as shown below.
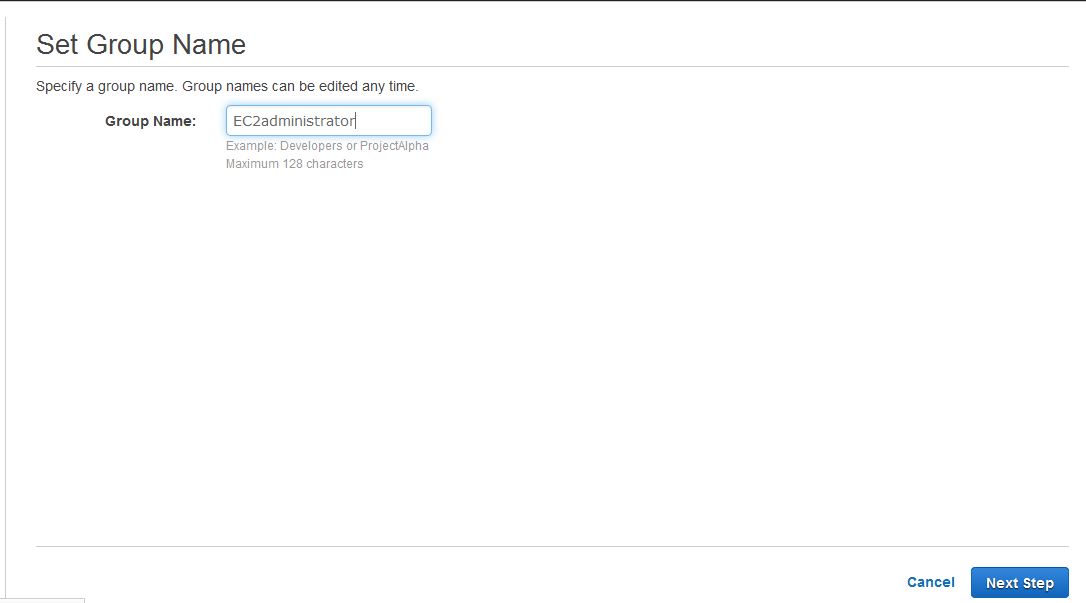
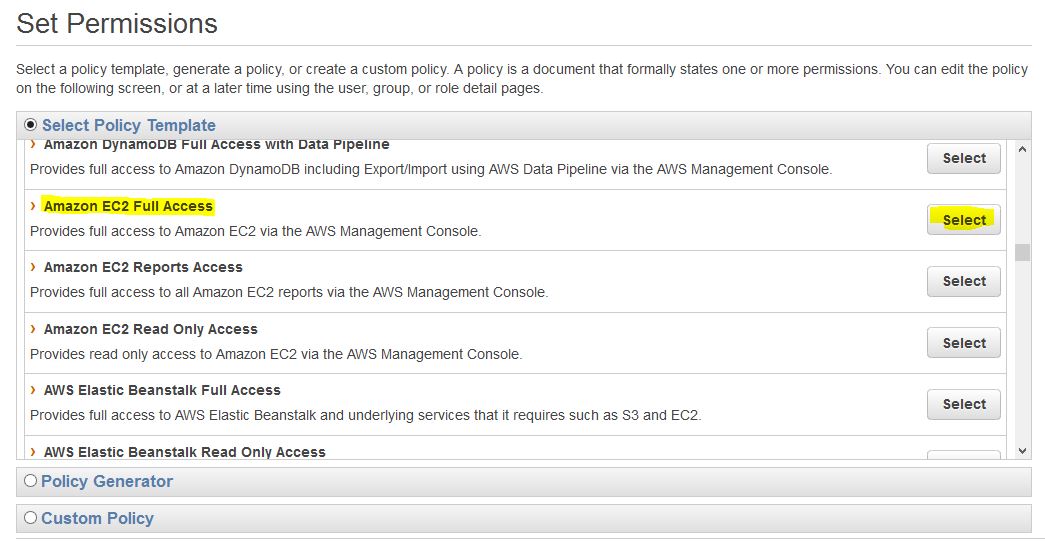
6. Set permissions for the group, (here I am granting full access to EC2 service we can choose services with respect to our requirement).
7. Now, navigate through Users –> siru –> Add users to Group.
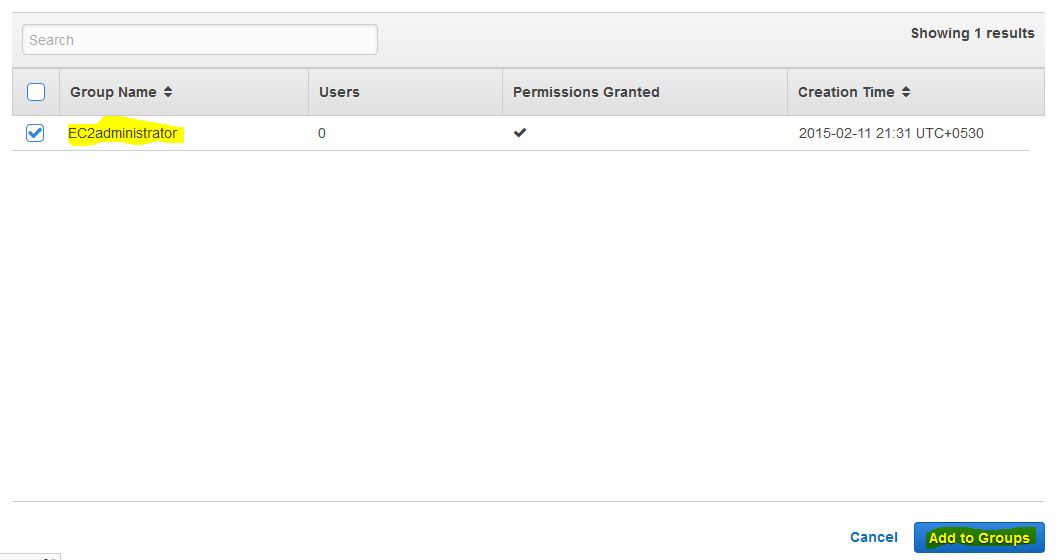
8. Now, you can see that the user is added to required group, we can add user to different groups.

Now, the user can login and navigate through EC2 services of your account to launch and edit instances on behalf of you.